I recently tried my hand at using Google's free SketchUp software to make some 3-D renderings of the Dunes Junction Layout. Mostly, I'm using to figure out my scenery and structure placement. Here's my first cut.
My one hint for anyone who wants to use SketchUp to plan scenery and the 'look' of things is to work in full size rather than in miniature. In other words, my 5' by 1 1/2' layout became a 444' by 130' layout.
Model railroadin' and trains. . . the South Shore line, mostly, but anything electric or Northeast Corridor or Northwest Indiana turns up here
Tuesday, July 19, 2011
3-D Mockups of Dunes Junction, Take One
Wednesday, July 13, 2011
On the Passing of William D. Middleton, Who Taught Me All About Electric Railroads
![]() |
| William D. Middleton (Railway Age photo) |
Middleton wrote about a wide range of railroad topics--including co-authoring a well-regarded railroad encyclopedia--but in my estimation his most notable contributions were his several authoritative books on electric railroads, trolleys, and interurbans. When the Steam Railroads Electrified is really the singular account of electrified mainline railroads in the U.S. Originally published by Kalmbach in 1974 and then revised and reissued by Indiana University Press in 2002, When the Steam Railroads Electrified followed up on his earlier electric-focused encyclopedic works, The Interurban Era (Kalmbach, 1965) and The Time of the Trolley (Kalmbach, 1971). Middleton's books have gone in and out of print, but most can be found via Amazon's used book resellers.
![]() |
| 1971 cover |
![]() |
| 1974 cover |
![]() |
| 2002 cover |
![]() |
| 2002 cover |
Meanwhile, I had that South Shore book checked out from the Lake County, Indiana, Public Library for something like a year straight during that time. The glossy plastic cover applied by the library saved it from the weatherbeating taken by Dr. Roebuck's WTRSE.
Over the years since, my travels and experiences have brought me into contact with the subject matter of Middleton's books. In addition to my childhood adventures on the South Shore (first train ride ever, got to hang out with the motorman between Ogden Dunes and Michigan City) I've been all up and down the Northeast Corridor under wire and on the third rail. And I've seen the Black Mesa and Lake Powell out west. Through all of these experiences, I've thought of how Middleton introduced me to these great sights and magnificent machines.
Today, I own the Indiana University Press editions, as well a couple of other Middleton titles, such as The Pennsylvania Railroad Under Wire. I leaf through them all often to get ideas and inspiration for Dunes Junction. And just because I like electric trains.
Bill Middleton will be missed, but his work will forever be a joy to me and many others who love trains.
Tuesday, July 12, 2011
Hacking Ikea: Keyboard Shelf=Model Railroad Control Station
| Ikea Summera keyboard shelf=Dunes Junction control center |
I thought about various hinge and drawer arrangements. I especially liked what the Model Railroader magazine crew did with its N scale Salt Lake Route project railroad last year: that layout's Digitrax Zephyr slid into a drawer in the layout fascia (link requires a password). But I didn't want to alter the 1"x2" grid framing foundation of Dunes Junction or append a (relatively) massive box or drawer to the underside of the layout.
I shied away from a hinge, partly because I didn't want to eat up space on our pantry shelves to accommodiate the swing of a hinged panel, and partly because I didn't want to drill holes or otherwise void the warranty of the Digitrax Zephyr Xtra with double sided tape, velcro, or the like.
Meanwhile, at my workplace, I recently noticed a mouse pad-sized platform on an extension arm mounted to the underside of my desk. Mouse pad-sized is also Digitrax Zephyr Xtra-sized, so this appeared to be a possible solution for retracting the DCC system under the layout when not in use, but unfortunately, a quick web search showed that these 'ergonomic mouse shelves' cost in the hundreds of dollars!
But that same web search turned up the Ikea Summera pull-out keyboard shelf, a paragon of spare Scandinavian styling priced at a reasonable $9.99. I rushed to my nearest Ikea store with tape measure in hand to look at the Summera shelf in person.
(An important note here, if you've never ventured into an Ikea store: you aren't allowed to rush, because the Swedish overlords of cheap, stylish home furnishings have engineered the store so customers may only can meander slowly through a highly controlled labrynth, the walls of which are formed by every piece of merchandise offered by Ikea. Also, if you are visiting an Ikea in the Metro Washington area, our 24-hour rush hour will similarly prevent 'rushing'.)
All digs on Ikea and the Capital Beltway aside, the Ikea Hackers web site offers a continuous feed of ideas for using Ikea products for something other than their intended purposes--I know that others have successfully used Ikea book shelves for layout benchwork, and I suppose there lots of other ways that Ikea stuff can add value to model railroading.
I bought the Summera keyboard shelf and mounted it to the underside of the layout with two scraps of 2"x2" lumber. When it's pulled out, there's enough room there for a beverage and an instruction manual (necessary cuz I'm still trying to figure out this DCC thing). When the shelf is pushed in, the Digitrax Zephyr Xtra is snuggled up under the layout, allowing unobstructed access to our pantry shelves. When I eventually apply a fascia to the front edge of the layout, it will have either a cutout or a hinged panel to clear the DCC controller.
But the best part: it was only $9.99. And it doesn't look too bad.
Friday, July 8, 2011
South Shore Freight Locos, Just For Fun
| CSS&SB Little Joe 802 and GP38-2 2002 at Dunes Junction |
Wednesday, July 6, 2011
American Electrics, "I see these a couple times a week" Edition
| Amtrak AEM-7 'Toaster' at Baltimore Washington International Airport in 2006 |
Apparently, AEM-7s are dropping like flies--fires seem to claim them with alarming frequency. Amtrak recently placed a giant order with Siemens for replacements. Look for decidedly Euro-looking ACS-64 locomotives in 2012 or 2013. (See below for an artist rendering)
![]() |
| Siemens ACS-64 (image courtesy Amtrak) |
Just darin' to dream here . . .
Sunday, July 3, 2011
Catching Up with Dunes Junction--Partially Blame the Beer
Holy smokes! It's been over two months since I've posted to Up Dunes Junction!
First, the excuses: there's work (got promoted, so now I write other peoples reviews and answer to even more people); there's family (#1 son placed in full time, salaried work; #2 son looking at colleges and studying abroad) . . .
And there's that other hobby (see photo at right--that's a pale ale I made recently).
Nonetheless, all of the trackwork and wiring is in, Digitrax DCC is up and running, and I 'hacked' an Ikea accoutrement to make a swell control panel. Look for a details on all of my progress in coming posts!
First, the excuses: there's work (got promoted, so now I write other peoples reviews and answer to even more people); there's family (#1 son placed in full time, salaried work; #2 son looking at colleges and studying abroad) . . .And there's that other hobby (see photo at right--that's a pale ale I made recently).
Nonetheless, all of the trackwork and wiring is in, Digitrax DCC is up and running, and I 'hacked' an Ikea accoutrement to make a swell control panel. Look for a details on all of my progress in coming posts!
Monday, May 9, 2011
Bullfrog Mechanical Turnout Controls Are A Go!
| Track is down. Woo hoo! Super- detailing, here I come! |
Why the hate, you ask? Some of my earliest memories of model railroading include the realization that Atlas and Tyco snap-track turnout motors are horrifically unrealistic, and a frustratingly precise touch of the button was needed to get those solenoid-powered things to actually fire.
The previous Dunes Junction layout used Fulgurex worm-gear motors and a home brewed linkage doodad that I cooked up with brass wire and tubing and some Rube Goldberg-style good luck. The Fulgurexes were not all that tricky, but expensive and noisy. My linkages were downright hideous, too.
In my quest for a happier, simpler Dunes Junction, I thought I'd go for a more elegant solution than grinding old turnout motors and DPDT control switches. I'd always liked the idea of throwing turnouts via a trackside mechanical throw, but that's impractical over track that will eventually sport a delicate lace of catenary wire. Thus, I needed a turnout control that is under the table and elminates the need to reach across the tracks. That's where mechanical turnout control comes in.
In the days of yore, some model railroaders used choke cables from the automotive world to control turnouts, instead of solenoids or motors and worm gears. The modern iteration of mechanical turnout control uses radio control airplane control rods, and a kind of mechanical-only, non-electrical locking mechanism such as FastTracks' Bullfrog or New Rail Models' Blue Point controllers. There are some homebuilt ways of doing mechanical turnout control as well, usually using an electrical switch or a door latch as a locking mechanism.
| FastTracks Bullfrog awaiting assembly. Did I mention these are extremely fun to assemble? |
| BullFrogs and Tadpoles assembled and ready for installation. That SpongeBob mechanical pencil adds visual interest to my workbench. |
Piano wire provides a springy but firm linkage to the turnout throw bar. Nesting plastic tubes typically used in radio control aircraft provide the mechanical control rod linkage from layout edge or control panel to the controller. These control rods need be mounted and guided firmly, so the crossover kits also come with Tadpole mounts, which are also laser-cut wood.
| BullFrog with z-link for crossover control. That black thing is an SPDT microswitch, which can be used to power turnout frogs. |
| Control nobs, front of layout view |
| Control knob from rear/underneath |
| The brass Sullivan clevis is clearlyvisible, as is some duct tape that steadies the control rod. |
The brass clevises provided in the Sullivan Gold-n-Rod kit turned out to be a lifesaver--instead of trying to thread the z-bend rod ends provided by FastTracks into the BullFrogs after they had been mounted and adjusted into the layout, I was able to screw the clevises into the rod ends and simply snap them on to the BullFrogs.
| BullFrog control rod overview. Look, no turnout control wires or switches! |
Next up: feed wires, then track detailing.
Sunday, May 1, 2011
Track Reconstruction Progress
Track has been going back in a steady pace. The Peco US-style Code 83 #8 turnouts are spiked down; the flex track has been glued down with DAP clear latex.
I have yet to solder any rail joints or feeders. I will do that after turnout control (my least favorite bit of model railroading--more on that in an upcoming post) has been completely and utterly tested and finalized. I am wary of having to unspike and unseat those turnouts as I sort out mounting and adjusting some new-fangled mechanical turnout controls.
Testing of the track's electrical quality has been good. That yellow flashlight in the photos is an electrician's circuit testing flashlight that I've had for over 20 years--it's a souvenir of my short-lived stint as an apprentice electrician back in Northwest Indiana right after the Army.
On my tiny layout, it's quick and easy to use the leads from that electrician's flashlight to ensure that there are no shorts and that conductivity is good. I couldn't help using some actual trains and alllgator clips to test the trackwork as well, which went swimmingly. Once permanent feeders are installed, I will post video of the first 'official' run.
I have yet to solder any rail joints or feeders. I will do that after turnout control (my least favorite bit of model railroading--more on that in an upcoming post) has been completely and utterly tested and finalized. I am wary of having to unspike and unseat those turnouts as I sort out mounting and adjusting some new-fangled mechanical turnout controls.
On my tiny layout, it's quick and easy to use the leads from that electrician's flashlight to ensure that there are no shorts and that conductivity is good. I couldn't help using some actual trains and alllgator clips to test the trackwork as well, which went swimmingly. Once permanent feeders are installed, I will post video of the first 'official' run.
Wednesday, April 13, 2011
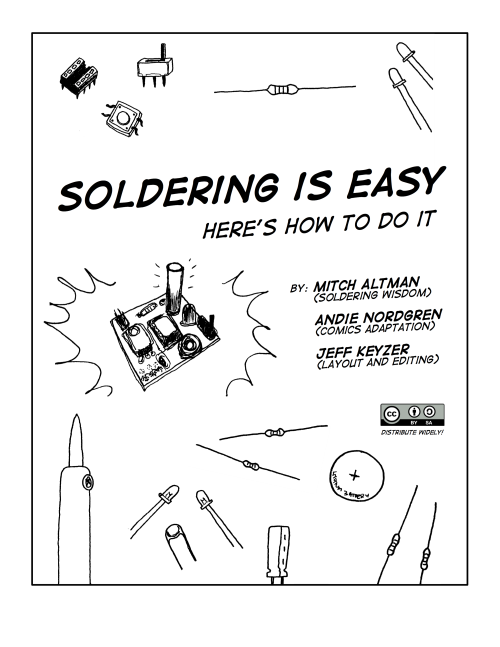
The Soldering Comic Book
Two of my favorite things in one: a comic book about soldering! Plus it's free! Bonus!
I've mentioned here before how much I love to solder, and with a railroad that'll (eventually, someday) be equipped with catenary, I suppose I had better love soldering . . .
Monday, April 11, 2011
Track Destruction Progress
| Track Destruction Mayhem! |
I've been using mostly putty knives for this job, with a little help from a 40W soldering iron. The soldering iron breaks loose feeders and rails that had been soldered to brass flathead screws at each end of the layout in anticipation of hinged staging extensions, a la an idea from an Iain Rice book on small railroad planning.
Under the new Code 83 order, I'll be using pieces of Atlas Code 83 sectional track to bridge to staging tracks--not as elegant, but more tolerant of error and discrepancies between detachable and/or hinged sections.
Saturday, April 9, 2011
When DCC Re-Wiring Goes Way Wrong
My efforts to upgrade the wiring on my Dunes Junction layout for Digital Command Control (DCC) went way wrong--but the end result will be better track. Plus I've become a little smarter about DCC and the current array of HO track offerings.
With re-ballasting more or less behind me, I began the effort to make Dunes Junction's track and wiring compatible with DCC. My old DC block wiring scheme was a series of compromises, and an unreliable mess. DC control was also keeping me from enjoying some of the latest advances in sound and lighting that I would like incorporate into Dunes Junction.
The layout is small and relatively light, so I detached it and put it up on sawhorses--indeed, this is one of the joys of a small model railroad--so I could begin the work of removing the old wiring and adding in more feeder wires. I even screwed in some cheap 1x2 furring strip on the top of the layout as bumpers to protect the track from damage when I flipped the whole layout upside down.
I soldered in new feeders all over the layout. (Remember, it's only 1 1/2' x 5' so that means three new pairs of feeders!) I had forgotten how much I enjoy soldering . . .
Problems arose when I began circuit testing. Turns out my Peco Code 75 turnouts are the 'Electrofrog' variety. Unfortunately, they were also inducing shorts across the whole (tiny) railroad.
A bit of internet research turned up a solution--specifically, Allan Gartner's Wiring for DCC site, which has a helpful page on Peco Insul- and Electrofrog turnouts. All I needed to do was snip a couple of jumper wires on the back of my four Peco Code 75 turnouts.
This is the point in the story where things go way wrong. My turnouts have been spiked and ballasted on to the layout already, so getting to the back of them was going to be a trick.
My approach was to carefully drill up through the bottom of the plywood subroadbed and snip the Peco-installed jumper wires. Because I could flip the layout face-down, I could easily and precisely drill through the plywood and the roadbed with my trusty AccuDrill Precision Drill guide.
Drilling went well--cutting jumper wires was a different story. Clipping Peco's wires, which I believe are made of a miraculous superstrong space-age nanotechnology that will someday be used to make space elevators and killer androids, turned out to be impossible, at least with my assortment wire cutters, knives, and dental instruments. It didn't help that all my cuttin' and snippin' was taking place through a single, and then a series, of 3/8" holes.
Long story short: I thoroughly destroyed the first turnout I attempted to modify for DCC operations.
The result: all the Peco Code 75 track is coming out and will be replaced with US prototype Peco Code 83 track. I like the American overall appearance of the Code 83 track and turnouts, even though the rail is a smidge taller than what I would prefer. And I'm using the Insulfrog style turnouts for their simple compatibility with DCC wiring. The track and turnouts have already been acquired; the process of pulling up the old track is underway. Stay tuned for more progress!
| Backside of the old Dunes Junction DC control panel. Oy, what a mess! |
The layout is small and relatively light, so I detached it and put it up on sawhorses--indeed, this is one of the joys of a small model railroad--so I could begin the work of removing the old wiring and adding in more feeder wires. I even screwed in some cheap 1x2 furring strip on the top of the layout as bumpers to protect the track from damage when I flipped the whole layout upside down.
| That 1x2 protects the track when I flip the layout over for wiring. |
I soldered in new feeders all over the layout. (Remember, it's only 1 1/2' x 5' so that means three new pairs of feeders!) I had forgotten how much I enjoy soldering . . .
Problems arose when I began circuit testing. Turns out my Peco Code 75 turnouts are the 'Electrofrog' variety. Unfortunately, they were also inducing shorts across the whole (tiny) railroad.
A bit of internet research turned up a solution--specifically, Allan Gartner's Wiring for DCC site, which has a helpful page on Peco Insul- and Electrofrog turnouts. All I needed to do was snip a couple of jumper wires on the back of my four Peco Code 75 turnouts.
This is the point in the story where things go way wrong. My turnouts have been spiked and ballasted on to the layout already, so getting to the back of them was going to be a trick.
My approach was to carefully drill up through the bottom of the plywood subroadbed and snip the Peco-installed jumper wires. Because I could flip the layout face-down, I could easily and precisely drill through the plywood and the roadbed with my trusty AccuDrill Precision Drill guide.
Drilling went well--cutting jumper wires was a different story. Clipping Peco's wires, which I believe are made of a miraculous superstrong space-age nanotechnology that will someday be used to make space elevators and killer androids, turned out to be impossible, at least with my assortment wire cutters, knives, and dental instruments. It didn't help that all my cuttin' and snippin' was taking place through a single, and then a series, of 3/8" holes.
| Peco turnout destroyed by my overzealous jumper snippin' |
The result: all the Peco Code 75 track is coming out and will be replaced with US prototype Peco Code 83 track. I like the American overall appearance of the Code 83 track and turnouts, even though the rail is a smidge taller than what I would prefer. And I'm using the Insulfrog style turnouts for their simple compatibility with DCC wiring. The track and turnouts have already been acquired; the process of pulling up the old track is underway. Stay tuned for more progress!
Tuesday, March 29, 2011
American Electrics, Out West Edition
We've mentioned here before that we like electric trains, especially those that run under catenary. Here we have Black Mesa & Lake Powell E60CFs, including two ex-National of Mexico E60Cs, somewhere in northern Arizona in July 2005.
![]() |
| BM&LP E60s in northern Arizona, July 2005. Steve Lee photo. |
Saturday, March 26, 2011
Ballast Removal Done, Now DCC Wiring and New Turnout Controls
Ballast removal from the Dunes Junction layout is now complete! Woo hoo!
Completion of the de-ballasting project clears the decks for some new layout renewal projects, which Dunes Junction management have dubbed the 'zen electrical simplification program,' the goal of which is less wire, more fun. Look for future posts on my zen electrical simplification program which will involve joining the Digital Command Control (DCC) revolution and mechanical turnout controls.
| Newly acquired SW1500 IHB 9213 on the de-ballasted interchange track at Dunes Junction. Steve Lee photo |
Monday, March 7, 2011
Sadness at the Passing of Small Layout Guru Carl Arendt
Over the weekend came the sad news of the passing of Carl Arendt, a tireless promoter of modestly-sized model railroad layouts. Ok, some really tiny layouts, ones that make Dunes Junction look like a basement empire.
Carl's quirky but always entertaining and informative Micro/Small Layouts for Model Railroads web site is a pioneer of do-it-yourself model railroad journalism. He published photos and track plans of little train layouts from all over the world. (We namechecked him in an early Up Dunes Junction post) He covered lots of stuff that escaped the notice of big old model train magazines--but did a lot to make the hobby accessible to people who don't have the time, or the money, or just the interest to have a DCC-powered basement empire with scores of locomotives, hundreds of cars, epic scenery, and monthly operating sessions.
I especially enjoyed his coverage of what I would call super-narrow gauge models--1/22.5 and 1/24 models that ran on 16.5mm, AKA HO, track and running gear. I've always had a soft spot for the narrow gauge thing (not as soft a spot as my thing for catenary and pantographs, though) and really enjoyed the innovative ways Carl featured these little tiny industrial, agricultural, and mining trains.
I never met Carl but I feel like he is a model railroad buddy. I've spent many an hour perusing the Micro/Small Layouts site, and gleaned plenty of inspiration from the treasures he gleaned from around the world. I am sad he is gone, and our hobby will miss him. Here's wishing his family condolences and many helpings of the good cheer he brought to the model railroading community.
Micro/Small Layouts for Model Railroads
Saturday, March 5, 2011
Subscribe to:
Posts (Atom)


