Showing posts with label Dunes Junction. Show all posts

Saturday, May 29, 2021

And Then There Were None: Long Live Dunes Junction! Long Live Old Line Corridor!

Just like that, the Dunes Junction and the Old Line Corridor layouts are gone.

Our house is getting a new family, renters with young children from overseas who are coming to Washington for medical training for a year. We’ve spent the past few weekends decluttering and clearing out the place for our new guests. Among the personal junk that needed to go were the Dunes Junction and Old Line Corridor layouts. 

We knew the layouts would need to be disposed of back in March, so I started making inquiries among model railroad network, and you like likely read about it here on the blog. I sought the advice of a few of our old heads in the Washington DC modeling community, who to a man wished me luck and told me to prepare to take a bath recovering layout building expenses. 

One option was to transport the layouts to our new home in Delaware. Realistically, we could really only accommodate one of those layouts, but after much soul-searching, I decided that any model railroading I would do in Delaware would be a clean sheet, all new project. I’m already plotting a modular European prototype project either N scale or possibly HO narrow gauge. Look for a future post on this topic. 

Dunes Junction getting ready to ride to Michigan. It stood up well to man-handling off its shelf brackets and into Greg’s car.
The announcement to my network didn’t yield the quick sale I had hoped for. I formed a backup plan to donate the layouts to clubs that had expressed interest in accepting them. A module group had its eye on the Dunes Junction for incorporation into its collection of show modules. An N-focused group thought it might be able to use the Old Line Corridor as either an exhibition layout or as salvage for its trees, structures, and catenary poles.

Ebay did the trick to motivate some buyers who had been lurking in this blog and on the Facebook groups to which I had been posting.

Dunes Junction sold first, to Greg, a modeler from Michigan. He was very excited to receive the layout, and he did a two-day road trip to come pick it up. He drove straight back with it and sent me pictures of it temporarily set up in his train room, complete with some of his own South Shore equipment running on it!

Dunes Junction in its new home, complete
with South Shore rolling stock.

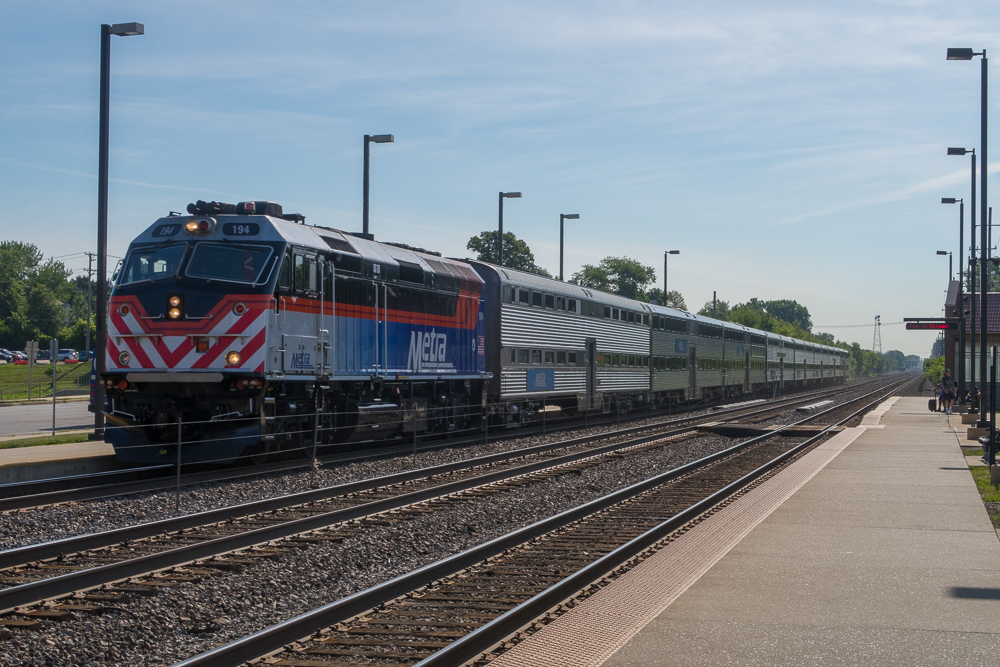
A week or so later, I sold the Old Line Corridor to Ryan Thoman, one of the owners of White Rose Hobbies in York, Pennsylvania. I was thrilled to learn that the OLC’s new home would be a public display at a hobby shop! A back-of-mind ambition for OLC had been exhibition, UK-style, and it pleases me immensely to know that kids and aspiring model railroaders will be able to enjoy and take inspiration from the layout. Ryan is a veteran of the Norfolk Southern on the Keystone and Northeast Corridors, and he looked forward to having an N scale re-creation of his former professional stomping grounds. 

The Old Line Corridor loaded up and ready for transport to White Rose Hobbies in York, PA.

York is a couple of hours away, and Ryan wasted no time in putting the OLC back to work. In less than 24 hours, NS and Amtrak trains were rolling through the OLC on White Rose Hobbies’ YouTube channel. It was truly a thrill to see the layout in action on line!


I expected to somewhat sadder about the departure of these two layouts than I actually was. I’m already thinking through the possibilities for my next model railroad project, which is likely to be N scale modules depicting European or possibly Northern Indiana prototypes. Watch this space…


Wednesday, April 21, 2021

Dune Junction Layout Needs a New Home

Life throws curveballs, and the house where Dunes Junction layout lives will soon be the home of a new family.

After much soul-searching, I’ve opted to dispose of the Dunes Junction layout, instead of moving it to our new house. 

Its small size—1.5’ x 5’—and Freemo-ish track would make it versatile starting point for a South Shore layout or module, and easy to transport in a station wagon or small SUV. It’s DCC ready, and will not include DCC hardware, rolling stock, or vehicles. Track plan and pictures from earlier posts assembled here for viewing convenience.

All reasonable offers will be considered—feel free to reach out to discuss if you are interested.


Monday, September 24, 2018

Mind the (Background) Gap

The source photo, before extensive
Photoshop-pery to blend it in.
When I visited the Northwest Indiana area--known in those parts as 'The Region'--I had several high priority to-do items, including eating some Aurelio's pizza and finally photographing the Mineral Springs crossing. I needed a good shot down Mineral Springs Road in the direction of Lake Michigan to fill the gap in the HO Dunes Junction backdrop. The appearance of oblivion elicits comment from everyone who visits the layout, and I have wanted to remediate this unsightly gap for the five or six years the backdrop and scenery have been in place. After some trial and error, I got the photo where it needed to be with Photoshop and numerous tries at the printer.
Before: that oblivion look. Is that the end of the world? Or just a high cliff overlooking Lake Michigan? Many visitors to
the layout—my father-in-law in particular—immediately call attention to this gaping sight.

After: I cleaned up the photo and used Adobe Photoshop to transform the photo, primarily to match up the angle of the road and roughly match up the coloration of the road surface and vegetation. Still not perfect, but it makes the point and solves a pesky visual distraction on Dunes Junction.


Monday, August 20, 2018

The Dunes and Chicagoland, After All These Years

A westbound South Shore train at Mineral Springs Road in early July 2018. This location--which formerly was the location of the Dune Acres flag stop--is the inspiration for my Dunes Junction HO shelf layout. 
I tagged along on a Chicago business trip with my wife, Rachel, in early July and visited the South
Shore railroad in the Indiana Dunes, as well as Chesterton, a well-documented hot spot with plenty of CSX, NS, CN and Amtrak action. During my visit to the Dunes area, I was able to complete a long-overdue task for my Dunes Junction layout: I finally got some photographs of Mineral Springs Road to use on the Dunes Junction backdrop.

Looking north toward Lake Michigan
on Mineral Spring Road. This photo will be used to fill that pesky gap in the existing Dunes Junction backdrop.
Look for a post on filling the gap
 in the near future.
Mineral Springs Road on the Dunes
Junction layout. Currently looks like
it ends at a cliff overlooking Lake
Michigan, which has bothered me for
years. 
My wife's business trip venue was up near O'Hare in the Northwest Suburbs, so I also explored some new railfanning territory on the BNSF/Metra 'Racetrack'. I got to the Belmont Station well past rush hour and prime lighting, but managed to squeeze off a few photos of Metra commuter trains and a freight. In all the years I lived near Chicago, I had never actually rail fanned this area, and my hour or
so trackside at Belmont was exciting and rewarding.

A mid-afternoon eastbound South Shore train outside of Ogden Dunes. The lattice catenary bridges featured on Dunes Junction have been replaced with new I-beam bridges. Also, Island Model Works is offering a 3D-printed N scale shell for these cars, should fit right on a Kato RDC...
Where steeple cabs, 700s, and 800s once roamed: an eastbound South Shore Freight engine move at Mineral Springs Road. A wood flag stop shelter stood where those instrument sheds are now when this was Dune Acres 

Freights like these come fast and furious through Chesterton. Railfan photography was actually banned here for a time due to several near misses. I took care to give the trains and the police a wide berth.
Chesterton station, now home to a museum, as a NS coil train rumbles past.
Westbound Metra train at Belmont. Even during non-rush hours, an hour or so will yield four or five trains.

Eastbound freight at Belmont. The sun was already too high for my taste by 11 AM or so, but that blue sky made up the difference.

Monday, August 13, 2018

Distractions and Diversions

What's happening on the Old Line Corridor: Designdyne/
Shapeways Pennsy Catenary Towers with black primer
 and mounted with magnets on roofing nails.
It's been over a year since a new Up Dunes Junction post, with distractions and diversions aplenty keeping me from both my Dunes Junction and Old Line Corridor layout projects. In addition to the usual array of grown-up cramps to my style, such as work, family, real estate, and the rest, old and new hobby activities have been vying my very scarce spare time.

First, new activities: A work friend and my younger son introduced me to the new generation of board and miniature gaming, which has become a surprise new interest. X-Wing, Catan, and Eclipse are my favorites, and I find the social scene and camaraderie to be an unexpected delight.

I've also been participating in Washington DC's storytelling scene. You've read here before about my interest, nay even love of the the spoken word, and the kind of storytelling I've been involved in so far has been akin to The Moth or This American Life on NPR (available as podcasts or broadcasts). It has been surprisingly fun and rewarding. Here's a link to a recent performance I gave at Washington DC's Story District.

Just not railroad modeling:
 workbench with armored
vehicle kit construction
in progress
Modeling has been going on, just not railroad modeling. It all started with the miniature gaming, particularly the beautifully finished miniatures for Fantasy Flight Miniatures's X-Wing and Armada games, set in the Star Wars universe. I acquired a miniature of Tantive IV, the first spaceship visible in any of the Star Wars movies (Princess Leia's cruiser, boarded by Darth Vader and his stormtroopers in the first few minutes of the original Star Wars movies). produced by Fantasy Flight for X-Wing. I vaguely knew it was a gaming miniature--but I wanted it because it was a beautiful model. In my quest for more Star Wars models, I stumbled upon Zvezda's state-of-the-art kit for the Imperial Star Destroyer from Star Wars. It's close to 30" in length when finished, and required nary a sliver of filler putty to assemble.

Zvezda Star Destroyer dominating my
workbench
With my appetite for plastic model assembly thoroughly stimulated, other kits caught my eye and I went on a bender of armor modeling, mostly in 1/72 scale. The small-ish military models are appealing to me in much the same way as N scale train models. Along the way, have caught up on a variety of new finishing techniques that will be put to good use in my model railroading projects.

Model railroading continues, albeit at a slower pace. Have put my hands on a couple of new locos, notably a second Fleischmann Rc4 to be converted into an AEM-7. Catenary towers are now primed and installed all around the layout. And looking forward to sharing it here on the blog.


1/72 Revell GTK Boxer APC, Federal German Army

O, Canada! 1/35 Trumpeter Grizzly APC

The best tank ever fielded, but I'm prejudiced:
Tamiya 1/48 M1A2. An excellent, fun kit

S-Model 1/72 Sheridan Tank, the most fun of all to build and finish.


Friday, February 3, 2017

Next Generation DCC: When Does It Come to North America?


Since I started this blog and throughout the construction of my current Dunes Junction and Old Line Corridor layout projects, DCC has been a series of surprises and delights: it continues to add unexpected joy and focus to the operation of my trains, and has occasioned a significant bit of fun learning. Nonetheless, every step in my DCC evolution seems to point the way to more and better ways of doing DCC.

I'm not the only model railroader who has noticed that DCC adds to train operation. Tom Barbalet of the Model Rail Radio podcast said it best when he described (more or less, and I'm paraphrasing) analog DC control as operating a circuit, but DCC as control of a model train. To elaborate on Tom's observation, DCC adds additional dimensions of realism such as sound, lighting, and other features, and also other less obvious realism opportunities such as consisting (MUing), speed limits and tables, and various compensations for poor or erratic operating characteristics.

Fun learning first focused on wiring and track for DCC but quickly progressed to decoder installs and programming. More advanced programming and the appeal of wireless walkaround control using smartphones led to use of the Java Model Railroad interface (JMRI). The more DCC tinkering I've done, the more DCC gear I've accumulated. My first DCC system was a Digitrax DCS51 Zephyr, and to facilitate its use with JMRI and WiThrottle, the Zephyr was joined by a Digitrax PS3 module. The Digitrax Zephyr is an ideal starter system, particularly for a small layout such as Dunes Junction or Old Line Corridor.

However, the Zephyr, PS3, and a laptop with JMRI installed--along with all of the 'wall warts' and power cords--was a space-hogging eyesore, particularly for a compact layout like the Old Line Corridor. To streamline my JMRI and control rig, I acquired a SPROG3, which is essentially a small USB box (less than half the size of that Digitrax PS3 module) that turns a JMRI-equipped PC or Mac into a mini command station. It's a fairly elegant solution but requires a little fussing and DIY spirit to get working correctly, and it does require use of WiThrottle for multiple train operation. In other words, the JMRI-SPROG3-WiThrottle combination rarely turned right on and worked without a reboot of host computer, iPhones, or other tinkering with JMRI settings.

I alluded to my next and latest bit of DCC gear in my locomotive mugshotting post: I recently acquired a second-hand ESU ECoS 50200 command station. Trevor Marshall's blog posts on his adoption of the ECoS system pointed me to this system, and subsequent research helped cement my decision to add the ECoS to my model railroading wishlist. The big color touchscreen was a draw, as well as simply executed but extensive controls, including color photo loco icons. However, an even more attractive feature was the ECoS' built in networking and connectivity features--this modern DCC command station would also tame the rat's nest of cables, adapters, and wall warts that accumulated when I connected my previous DCC systems to my network and computers, and hopefully simplify interfacing JMRI with my DCC.

As Trevor noted in his posts on the ECoS, its capabilities are overkill for most North American modelers. It supports graphic control of a whole layout--imagine a digital, on-screen display of an entire layout, not unlike an old-school analog control panel with switches and whatnot. It also supports a number of legacy European alternatives to our NMRA standard DCC--imagine a DCC command station that could also handle Hornby Zero One, PSI Dynatrol, and DIY CTC16, in addition to DCC. It will also handle Maerklin three rail trains and communicate via a few different proprietary European network standards. All of these features and capabilities give the ECoS its hefty street price--around $700 in the US--which made this a 'wishlist' rather than a 'buy it now' item. So when a used ECoS at a bargain price came calling, I answered.

So far, my ECoS is living up to its promise. Its home is a keyboard drawer under Ivy City yard on the Old Line Corridor, and it joins my home WiFi network via a single IoGear Ethernet-to-WiFi adapter--no more ungainly direct cable connection between my railroad and network. It joined immediately with JMRI, warts and all (more on that shortly). When I'm feeling frisky and want to do walkaround operations, I use the TouchCab iOS app on a pair of decommissioned early model iPhones. (The Android-powered ECoS Mobile Control II is still very much on my wishlist, needless to say). And I'm pleased as punch at those color loco icon mugshots!

What hasn't lived up to the promise is access to the ECoS via computer. ESU has made it easy to view and backup configuration settings via web interface, and the web interface is how color photo loco icons upload to the ECoS. But changing the ECoS' configuration via a connected computer is not straightforward--aside from uploading loco icons, there is little that can be changed or added to the ECoS via ESU's 'stock' web interface. JMRI, once properly configured, does access the ECoS over a local network and in its current build will allow what amounts to a one-time upload of the JMRI roster to the ECoS. However, the ECoS and JMRI do not truly synchronize after that initial upload. I am currently working with the JMRI user community to develop a repeatable, on demand capability to upload JMRI roster entries to the ECoS, which will be an important step toward achieving true synchronization between JMRI and the ECoS.

This standout piece of DCC kit and my troubles getting it to work comprehensively with JMRI point the way to the future of DCC.

First, the ECoS' look, feel, and user experience (UX, in industry parlance) are superior to practically everything currently on offer from US DCC manufacturers. The touch screen and graphic user interface should be more or less standard in the industry--Ring Engineering is the only North American train control product I know of with such an interface, but it is not DCC. While the ECoS is admittedly expensive in comparison to US starter DCC systems, I strongly suspect that its compatibility with multiple control and networking standards and dual controls are more expensive cost components than its main UX features, the color touch screen and menu-based user interface.

Second, networking and computer access for configuration and programming should not be an afterthought in DCC products. The ECoS' built-in Ethernet should also be a standard feature of DCC systems, and for that matter, WiFi would likely be easier, cheaper, and more user-friendly to incorporate. Networking and WiFi are currently built into a dizzying array of technology today--the 'internet of things' we've all been hearing about--and it should now be easy to cheaply incorporate wireless connectivity into new DCC products. 

An aside: I'm surprised that JMRI still hasn't been joined in the marketplace by either a standalone competitor, or by a manufacturer-specific alternative to or customized variant of JMRI. The web-based computer access to the ECoS offers a tantalizing glimpse of the possibilities here--I, for one, would pay money for a "it just works" PC/Mac software product with the functionality of JMRI and the simplicity of ESU's web interface.

I'm thinking of a Digitrax Zephyr- or NCE Touch Cab-like starter system with basic, small layout capabilities that dispenses with the keypad and LCD/LED alphanumeric display in favor of a touch screen and menu picks, and adds WiFi. An interface that works with common home computing devices (Windows, Mac, iOS, Android) would allow access to advanced system settings and loco rosters/ If nothing else, such a system would appear more contemporary with other common non-model railroad devices and have greater appeal to beginners and younger model railroaders, in addition to be being more intuitive and fun to use than endless key presses and cryptic abbreviated messages on LCD or LED displays.

Already, European manufacturers other than ESU, such as Piko and Roco are introducing a new generation of basic yet graphic-intensive, network-enabled DCC system that take their design queues from the ECoS--when will American manufacturers like Digitrax, NCE, MRC, and CVP join the trend with next-generation DCC?

Friday, January 6, 2017

Mass In Motion, AKA the Sensory Surprise of N Scale Trains

When I started my N scale Old Line Corridor experiment last year, one of my objectives was to be able to run trains--whole trains, MUd locomotives, maybe even have meets and passes on the layout. In short, I wanted the OLC to be like railfanning somewhere on or near the Northeast Corridor, where big railroading happens.

Across the basement over at the HO scale Dunes Junction, there are trains running, to be sure, but the experience is decidedly unlike railfanning a former Pennsy (or any) mainline. It's more like a visit to a South Shore or Northwest Indiana railroad museum, where lovingly restored vintage rolling stock does 'over-and-back' moves around a section of restored right-of-way.
Running trains around the a-building OLC has already become an unexpected and satisfying pleasure. I had imagined that once scenery was more complete, perhaps with weathered rolling stock, I might feel a sense of realism. My test runs, however, surprise with the sense of mass in motion and the evocation of being in the presence of moving machinery and bigger-than-life technology. Have a look at this short video for a sense of how freight is moving around the OLC.

It's mostly the small size of N scale that is allowing me to see and experience the trains similarly to how I see and feel them in reality. Rarely do I actually see individual rolling stock up close, as at a museum; I'm more likely to see a locomotive or two trailed by freight or passenger cars that extend beyond immediate my field of view, passing through the landscape of suburban Maryland where I live or in the places I visit.

Realistic and controlled movement play an equally important role. The overall high quality of contemporary N scale locomotives is key to this measured movement of implied momentum and mass, but DCC deserves significant credit as well. The fidelity of control offered by DCC--particularly enhancement of lower speed control but also the ability to program lower top speeds--means that trains move more like the prototype. I've never experienced better or more versatile control of my trains.

Not sure I have ever experienced this sensation of realistic, massive movement on a layout of my own, and if I have experienced it with HO trains it was at a club or museum layout, such as when I visited the San Diego museum layout a few years ago. But I am surprised and delighted to see big ol' trains on my modestly-sized home layout.


Sunday, February 21, 2016

What's Been Happening Around Dunes Junction

SAM_3439.jpg
Coming Soon: Southwest Chief Adventure!
It's been a good long while since my last post in September, and all I have to offer are my usual excuses about work and family responsibilities competing for scarce time and resources. Work has indeed kept me hopping, with lots of travel and interesting new boss responsibilities. But trains--both the prototype and models--have very much been on my mind. Over the next couple of weeks, I'll post on a holiday cross-country train trip and some new exciting new directions with my heavy electric modeling. Stay tuned!

Friday, April 3, 2015

Dunes Junction Track Plan Updated

The current Dunes Junction track plan, rendered using RailModeller and RailModeller Pro.

Sunday, March 1, 2015

Posing Under the Completed Catenary at Dunes Junction

Just as catenary was reaching completion, this rare custom painted Nickel Plate Products Sumitomo car joined the Dune Junction roster. It was barely out of the box when I staged this photo, which folks on the Facebook "Traction Model Railroading" and "Chicago, South Shore, and South Bend: the Last Interurban" communities enjoyed. Several Facebook users immediately identified the location as Dune Acres, Indiana--a gratifying modeling moment.

Not sure if a meet like this ever took place, as the 800s (Little Joes) were pretty much focused on switching East Chicago and Gary industries like Harbison Walker Refractory when stainless steel Sumitomo cars took over in the early 80s. Road freight duties east of Gary were in the hands of GP38-2s and GP7s. But I thought it would make a good image anyways. 

Another view of the all-electric meet, with a good view of the crossover catenary--my own little web of complicated wire.  The front of layout looks frightful--these photos might cause me to get some fascia in place sooner rather than later. 

Friday, February 20, 2015

Catenary Crossover in Action!

The mainline crossover at Dunes Junction is now under wire! Check out South Shore 802 and a MARC toaster slithering through the crossover! Woo hoo!


Aesthetics comes next: trimming excess wire, cutting in insulators, and painting and weathering the wires and poles.

Wednesday, February 11, 2015

Catenary Update: Learning from Mistakes, Advice from Wire Jedi, and Test Run Video


Catenary is mostly installed and finally resulting in successful test runs on the Dunes Junction, as seen in the quick-and-dirty YouTube video above.

There's been quite a bit of experimenting to get to get to this point, but I've got the hang of hanging catenary now. Translation: I hung, tore down, and re-planted poles and re-hung and adjusted catenary.  Others call it failing, but I call it learning, and it has been a rewarding process. And still no burnt fingers!

I actually got catenary up over the entire main line, and initial testing wasn't pretty. My MTH 800 (Little Joe) dewired regularly, and some of my other test models--a Bachmann E33 and and Atlas AEM7--fared somehat better.

Insufficient tension and too long of wire runs were the culprits. My pole distances were wrong--spaced too far apart, and not uniform. I removed and repositioned poles to achieve a uniform 19" spacing for the 20" stock Model Memories catenary sections, and also made a hidden anchor bridge from heavy brass stock that is neatly tucked behind the US 12/20 overpass to address the tension problem.

At first, the respaced poles and rehung sections worked only marginally better for the 800, with dewirements continuing. I admit, I was disheartened. So I reached out to two people I who know a thing or two about model catenary: Don Silberbauer of Model Memories, the maker of catenary components I use; and Rick Abramson, New Haven modeler extraordinaire and HO heavy electric expert who has been blogged about here previously.

Thanks are due to Don and Rick, whose heavy electric Jedi abilities include sensing a distressed fellow heavy electric modeler across vast distances.  Both of these generous gentlemen promptly got back to me with advice and encouragement.  Most importantly, Don and Rick affirmed that trial and error and an embrace of momentary failure are an essential part of the model catenary experience.

Both pointed out that the pantographs on most commercially available HO models are for show only, too tightly sprung or otherwise barely functional.  "The manufacturers never figure on the pans actually running under wire," Don wrote me via email. The excess upward force caused by the tight springs on the MTH model was at least contributing to dewirements.

Rick echoed that observation during a telephone 'pep talk' that ultimately inspired me to go back and double check my wire work. He also mentioned wire "flapping in the wind"--without appropriate tension or rigidity--as a possible problem.

I went back to my wire work and discovered that not only did I need more tension, I also needed to be more conscientious about gauging, or centering the wire over the rails. The angle and direction of my work on the wire is dictated by the fact my layout is on a shelf and is at shoulder height. Unless I take extreme care, the wire ends up to the inside of the gauge because I see the gauge blocks from the side rather than directly above, and thus I discovered a consistent bias to my wire gauging. The comparatively narrow shoe surface on the 800 pans didn't react well to the inside-leaning wire. But my recheck and fixes of the wire gauge appear to be working well with the 800 now.

So now my main line has working wire, as seen in the YouTube video above. Woo hoo! My next step is wire over the crossover, about which I am nervous. A final touch will be painting and weathering the catenary. Look for future posts on my wire progress!


Thursday, February 5, 2015

More Catenary Construction

Quick iPhone snapshot of wire hanging progress at Dunes Junction. The upside down plastic cups are protecting cross bucks and other scenery details.  Wood wire height/centering gauge blocks, per Model Memories' instructions, are in the background. Other accoutrements in include solder, extra hands, emery board, alligator clips and a Viessmann catenary wire gauge.
Catenary construction is progressing faster than expected. I'm more or less following the instructions included with Model Memories catenary parts, with some deviations here and there.

My soldering skills have improved with each successive joint and splice, so anyone undertaking a project like this might want to practice--I wish I had!

Here are a few insights and tips:

  • Clean and prep everything on the joint or splice you are about to solder. Emery boards, needle files, and wire brushes are useful for this essential task.
  • Use alligator clips and self-closing tweezers to positing everything BEFORE applying heat and solder.
  • Position alligator clips and self-closing tweezers as heat sinks to protect nearby solder joints and to focus heat on the joint you are working on.
  • A good soldering iron is worth the extra money. I'm using a Weller WPS18MP High-Performance Soldering Iron (got mine at Amazon), which was worth the money and the slight wait. Its ergonomic grip also keeps the hot tip from touching surfaces on which it is resting, and it uses a wall-wart power supply, which keeps that grip light.  An on/off switch and ready light are also extremely handy and useful. There's also a an LED light that illuminates the tip.
And still no burned fingers!

Thursday, January 15, 2015

Oh, the (Grab) Irony: Island Model Works South Shore Car Project Update

Another busy Autumn with lots of work and fun travel slowed--but didn't stop!--progress on the IMW South Shore car build. Check out some grab iron and railings that recently went on the car:

The end grabs and entrance door railings are press fittted in
for easy removal, as this car will get some serious manhandling
 when the lenses and glazing are installed.
I used a 2mm detail removal chisel from Micro Mark to remove the original molded-on grab iron and railing detail. While there was still a shadow of the original details remaining on the model, I marked the holes for drilling with an awl to eliminate any guesswork about where to drill and mount the new railings. Sanding sticks were used to finish and smooth out locations. Masking tap over the corrugations/flutes on the side protected those details from getting scraped or sanded off

For the end grabs, I could have used some pre-formed wire grabs but I wanted to try something new and craftsmanlike, so bent  I my own end grabs and railings using .015 brass wire and Micro Mark's Grab Iron Bending Gauge. (Yeah, I went on a little Micro Mark buying frenzy, which is easy to do when you're out on the road, late at night in a hotel thinking about model railroading and you have a good, reliable Internet connection . . .) Takes a little practice, but that gauge let's you make uniformly shaped grab irons of pretty much any size.

Expensive but worth it: Micro Mark wire bending gauge (top)
and 2mm chisel
The grabs and railings are press-fitted in for the moment, because there will be some more rough handling as I fit the window glazing, drill out and fit lenses for the headlights and marker lights, and I add final details such as windshield wipers and ditch lights. I also anticipate employing a plastic modeling technique to prep this model for final painting, which is to use a special primer called surfacer to find, fill, and sand any flaws--thus my avoidance of actually attaching many of the smaller details such as horns, bells, grabs, etc.

Meanwhile, another one of these IMW South Shore kits has found its way on to my workbench, along with another Walthers RDC drive. The second time around ought to be easier (and better).

Monday, July 14, 2014

IMW South Shore/NICTD Nippon Sharyo Drive Complete and Lookin' Official

The Island Model Works Nippon Sharyo South Shore/NICTD drive more or less complete. The IMW sideframes were sawed off their bolsters and carefully thinned with a mill file. Meanwhile, the Walthers Proto 1000 RDC plastic sideframes were trimmed down to the metal skeletons that serve as bearings and electrical pickups, and the remaining plastic also thinned down to 1 mm/.040" or so with files and sanding boards. The outer IMW and inner RDC sideframes were epoxied together, taking care to ensure perfect alignment.  1/4" x 3/4" basswood topped with a piece of K&S 3/32" brass channel support the lighting LEDs. Barely visible are holes to accept 2-56 mounting screws for mounting the body shell. A coat of Tamiya German Gray spray paint (fine texture but good old solvent based, easy to find in hobby shops) on the chassis, light supports, motor saddle, and sideframes make it look official.

Tuesday, July 8, 2014

IMW Nippon Sharyo Construction Progress: Building and Testing the Drive

The Island Model Works Nippon Sharyo South Shore/NICTD car is coming along. As noted in the first post on this project, the Walthers (formerly Life-Like) RDC drive and lighting/DCC board are providing the guts for this drive.

The Walthers RDC drive components installed on the IMW South Shore car floor. RDC sideframes still in place, and the steps and pilots sawed off. Note the heavy brass stock, which adds weight and stiffness. If I build another of these cars, I will use a longer piece of brass so that it extends over the truck and can be used as its bolster.
The RDC drive comes apart in a fairly straightforward way via several metric screws and clips. Remove the ingenious plastic clips that hold on the wires from the lighting/DCC board, and then unscrew the board from the frame. The brown plastic motor saddle/seating insert come out next.  The motor mounts are rubber, and can be wiggled out by pulling on the motor/motor cradle assembly and pushing up on the mounts from the bottom of the floor.  The non-drive truck is tricky to remove; the bottom plate comes off, exposing the screw at the top of the hollow inside of the truck. The drive truck comes off via a snap-on clip that also secures the worm and bearings, similar to a good ol' Athearn drive.

According to IMW's web site, the kit is intended to 'accept' RDC drive parts. The RDC drive parts hardly 'drop in', but IMW gets the builder most of the way there.  The motor mounting holes, for example, are spot-on, but need to be carefully drilled out to accept the soft RDC motor mounts.

The drive truck mounting hole in the IMW needs very careful reshaping--it should be identical to the mounting hole in the RDC floor. Its 'length' is correct, but its 'width' is not. This may be a leftover from an earlier, Life-Like iteration of the RDC drive, but it was not correct for the drive components from my Walthers RDC drive. The position of the truck mounting hole and the motor mounting holes allow use of the motor and the universal shaft without any modifications to those components.

One of the included bolster adapters or sheet brass or styrene should be used for the non-drive truck. I used .080" styrene sheet plus a bit of styrene rod as a boss for my non-drive truck bolster. Were I to do this over again (or build another one of these kits in the future), I would use a long piece of heavy brass stock as bolster, stiffener, and weight.

Speaking of stiffening and weight, I epoxied heavy brass strips between the motor and and non-drive bolster to give the floor some rigidity and heft.

I used the brown plastic motor saddle (minus most of the seats) and a block of 3/4" x 1/4" basswood as supports for the lighting/DCC board.

Once wired back up and circuit-tested, the new drive worked quite well. I installed a Digitrax DH165IP decoder. Check out the video below to see the drive and the partly assembled coach in action.
With the drive tested and operational, the next steps for this project will focus on appearance elements, such as replacing the RDC truck sideframes with IMW's Nippon Sharyo sideframes.

The car body will now be the focus. In addition to adding pantographs and various other appurtenance details (horns, bells, wire grab irons,  etc), I will rebuild the pilots and steps as part of the coach body. The cleanly-molded and prototypically thin RDC steps will be recycled here. Also, the pilots will be scratchbuilt from styrene to replicate the 'flat face' look of the prototype--the kit as engineered has a large seam between the car end and the pilot, which doesn't look right to me. Then on to window glazing, painting, and finishing.

Monday, August 26, 2013

Free-Mo Compatibility for Edge-of-Layout Transition Tracks

Something that's been bugging me for a while has been how the track ends at the edge of the Dunes Junction layout. I had left 1 1/2" of space at the end of the roadbed, into which I had fitted removable lengths of Atlas code 83 section track with a styrene sheet underlay and ballast, with the idea that this gap at each end could easily accommodate transition tracks for staging cassettes or more layout.

Coincidentally, I had been reading up on Free-Mo HO module standards, and a more elegant-looking and mechanically sound transition track idea presented itself: BNM Hobbies printed circuit board tie plates. These tie plates have ties milled into half or so of the ties, with copper soldering pads in place of tie plates.  The other half or so have a channel milled out to accommodate a transition rail fitted with a joiner. The idea here is to use a length of rail to join modules or sections together.
The BNM PC Board tie plate: solder pads for rail on the left in this photo, and a milled-out trench for transition rails on the right.
The completed Tie Plates, ballasted and weathered in. The 1/2" lengths of rail can be easily removed if and when I expand the layout or add staging tracks. 


Tuesday, August 20, 2013

Inspiration Photos: Looking Up and Seeing Your Model Railroading Goals

Put up some prints of South Shore scenes and details--nothing too fancy--that help me visualize what's going on at Dunes Junction, and also give visitors a sense of the 'vision' of the layout . . .

Saturday, August 17, 2013

Finishing Touches for the Mineral Springs Road Flag Stop

Here are two views of the more-or-less complete flag stop at Mineral Springs Road.  The shelter is scratchbuilt from Evergreen styrene siding and strips, with a photo-printed tar paper roof. The public phone is straight off the sprue from Walthers Cornerstone detail set. The guard rail posts are cut from Code 70 rail, and a Blair Line stop sign was the last bit added.