 |
| The DesignDyne/Shapeways NEC Substation in place on the Old Line Corridor |
 |
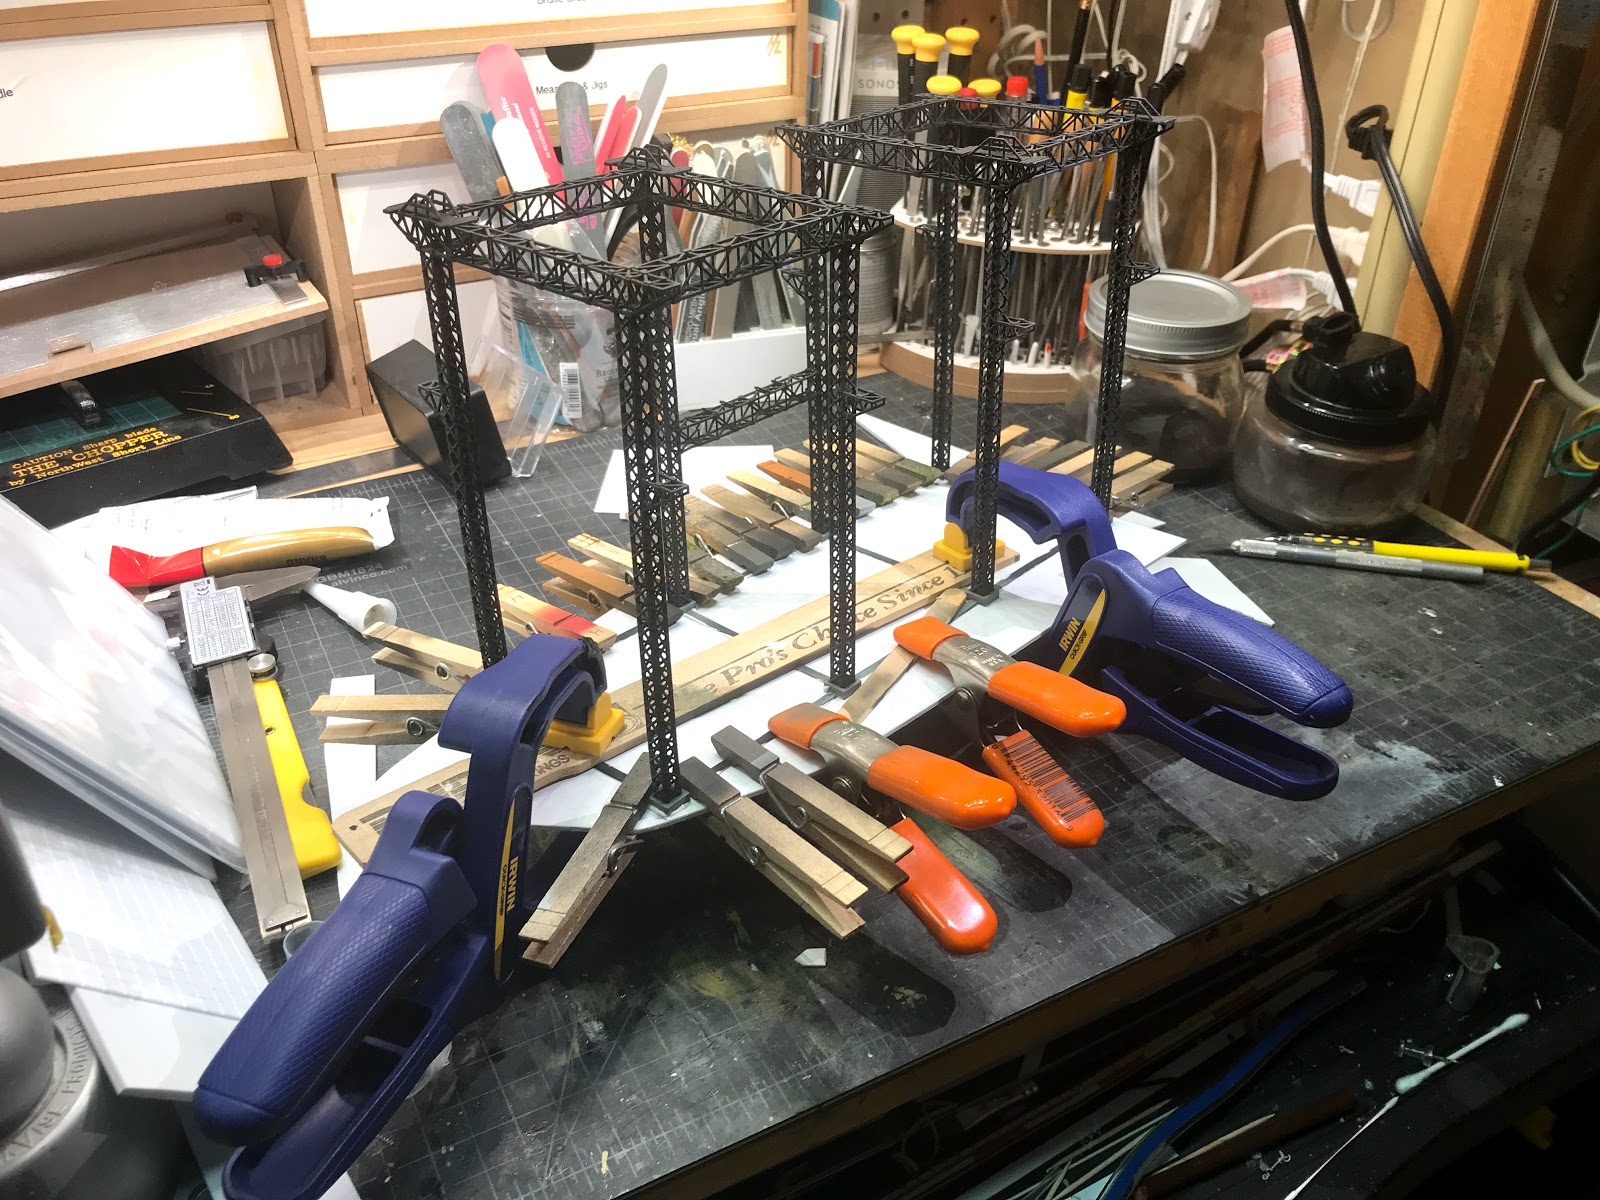
| Test Fitting: the DesignDyne/Shapeways Northeast Corridor Substation with a little tiny Piko/Con-Cor substation inside it. Note the bowing of the outside columns. |
A few weeks later I received an enormous box containing the N scale NEC substation. It is printed in 'White Natural Versatile Plastic', which is stronger than the 'Frosted Ultra Detail' (since replaced by 'Smooth Fine Detail Plastic') from which OLC's catenary bridges were rendered. On the plus side, WNVP comes from Shapeways 'clean' and is not coated with a waxy film of print residue that must be removed in a bath of hexane or Bestine. A soap and water rinse is all the prep this 3D printing material needs before painting. On the negative side, WNVP has a rough, porous finish. For a background structure model of this size, volume, and lattice detail, the WNVP material gets the job done, and is strong to boot.
My substation was a little warped. The end columns bowed outward, which I suspect is a function of the structure, rather than a flaw in the material: skinny, unbraced lattice columns, and curling in the 1 mm- thick spacer straps connecting the concrete footings at the bottom of the model. Indeed, putting downward pressure on the straps actual mitigated the bowing somewhat. But I also gently clamped a rigid scrap of straight hardwood to the most bowed end columns and applied some gentle heat from a craft heat gun. After each column cooled back to room temperature, I unclamped the wood, which corrected the worst of the bowing.
 |
| What a difference black primer makes! The paint brought out the detail and transformed the look of the model in a short time. |
I used Badger Stynylrez black primer, which, despite being a water-based paint, is a true rugged primer with strong adhering qualities. Stynylrez has some specific instructions that are somewhat unusual compared to other model-oriented paint. It should not be thinned, and is recommended be sprayed at 25-30 PSI using a .5 mm or heavier needle. To get all the nooks and crannies, it took me an hour or so using my Grex Tritium airbrush.
While the primer set for a day or so, I puzzled over how to paint this. These substations were originally painted an aluminum color, which would be appropriate for a 30s-early 60s era model, but from the Penn Central period to the present, most of these substations--along with catenary towers and other right-of-way infrastructure--weathered to a rusty grime color. A few in New Jersey have been repainted in aluminum in recent years, but most I've seen between DC and Philadelphia are weathered rusty grime. So I airbrushed additional coats of rusty browns and dull grays with Vallejo Air colors I had on hand. I also used folded 3x5 cards as masks to shoot the footings with Vallejo Air's excellent concrete color, a buff gray shade.
 |
| The painted and weathered substation glued to .080" styrene cut to fit it on the OLC with Liquid Nails. All that clamping ensures that the model's base is perfectly flat and that the columns are square and straight. It dried for over 24 hours. |
 |
| Blending the base with Vallejo ground texture. |
Once the glue set and the clamps removed, I fit some .040" styrene in between the base straps make a more-or-less flush, continuous surface for attaching the Piko/Con-Cor substation. Vallejo Diorama Effects Rough Grey Pumice ground texture, an acrylic gel-based scenery product, applied with a palette knife, blended the base straps and styrene into a continuous, smooth base.
After the Vallejo ground texture dried, the Piko/Con-Cor substation was glued in with white Elmer's glue, and more Vallejo ground texture built up to blend in the 1/8"-thick Piko/Con-Cor substation base into the overall base. Z scale gravel and turf materials were glued down with thinned white Elmer's glue to blend all together.
 |
| Ground cover roughed in before the painstaking Gold Medal Models fence installation. Temporarily sited on the layout, the T-pins will guide application of glue and scenery materials. |
Gold Medal Models chain link fence with barbed wire fence, painted with Rustoleum primer and Camo Brown was installed around the perimeter of the substation. Working with this photo etch product and ensuring that the fence posts were appropriately located and drilled was the most tedious and painstaking step of this substation project.
Once the fencing and base ground texture were dry, a bead of earth-colored Vallejo ground texture was applied to the edges of the substation site on the layout, and a bead of Elmer's white glue on the bottom of the substation base. T-pins stuck into the layout around the edges of the .080" styrene base marked where the ground texture and glue should go. Once the base was maneuvered into position, the T-pins were plunged in to firmly clamp the base to the layout, which set for another day or so.
The T-pins were removed once the ground texture and glue were dry, and final scenery blending commenced. First, more ground texture was added to blend and smooth the base into the layout. Various turf, ballast, and vegetation materials were then added to finally blend the substation into the layout.
No comments:
Post a Comment